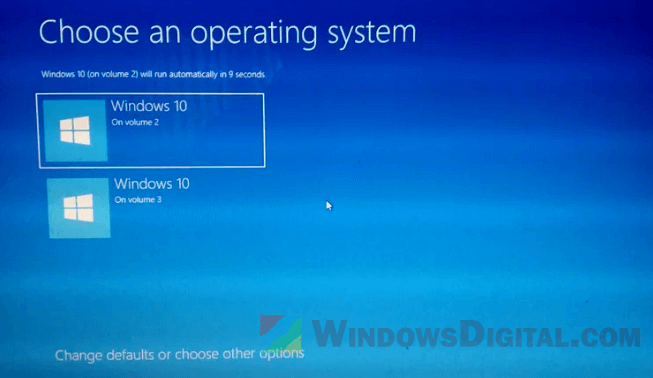
If you encounter the “Choose an operating system” screen every time you start or restart your Windows 11/10 computer, it means you have multiple Windows installations on your system. This screen, also known as the dual boot options menu, appears because Windows wants you to choose which Windows version to boot during startup. This guide will show you how to remove or disable the “Choose an Operating System” screen from appearing in Windows 11/10.
Even if you have formatted your primary hard drives, this screen will still appear as long as Windows detects another Windows OS on other partitions or drives that you did not format. However, you don’t need to format your drive to get rid of the dual boot menu options screen. You can simply remove the old Windows version from the dual boot menu, leaving only your current Windows. This way, there will be no other operating system to choose from, and the “Choose an operating system” screen will be skipped on startup.
How to remove the “Choose an Operating System” screen
If you use only one Windows version, you can remove the old Windows installations that you no longer use from the boot option list. Doing so will inform Windows that there is only one Windows version to boot from, eliminating the need for the “Choose an operating system” screen to appear. Follow these steps to do this:
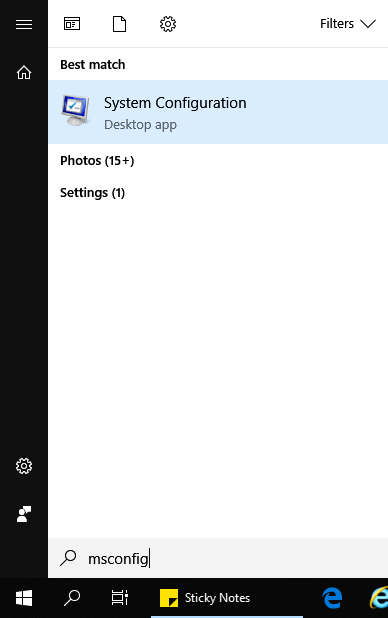
- Go to the Start menu or use Cortana. Type “MSCONFIG” to search for and open System Configuration.
- In the System Configuration window, go to the Boot tab.
- You should then see a list of Windows installations on different drives in your computer. Select the ones you no longer use and click Delete, until only the “Current OS; Default OS” remains.
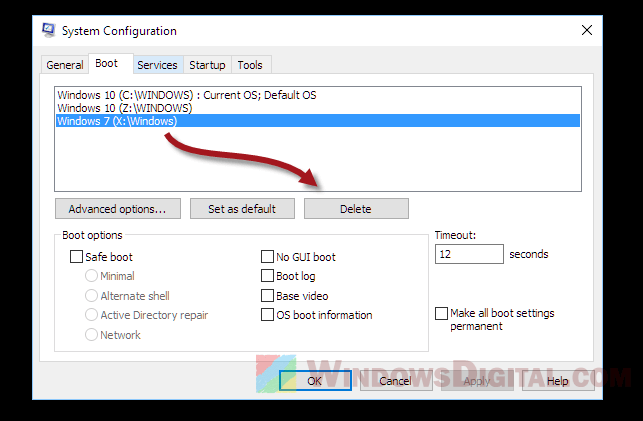
- Click Apply and restart your PC. The startup should now skip the “Choose an operating system” screen automatically.
If you find yourself stuck on this screen even if you have only one Windows installation, especially after a recent major Windows update, you can check this article that explains what might be causing the issue and how to potentially fix the problem: Windows Rollback Loop After Windows 10 Update (Fix).
Dealing with additional boot issues in Windows 11/10
Apart from the standard method mentioned above, there may be other scenarios where you encounter boot issues in Windows 11/10. In this section, we will discuss some of these cases and how to resolve them.
Manually edit the boot configuration data (BCD) file
If the System Configuration method does not work, you can try manually editing the Boot Configuration Data (BCD) file. To do this, follow these steps:
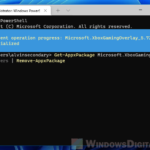
- Open the Command Prompt as an administrator by right-clicking the Start menu, selecting “Windows Terminal (Admin)” and then selecting “Command Prompt.”
- Type the following command and press Enter:
bcdedit - Locate the boot entry you want to delete, and note the identifier.
- Type the following command, replacing the “IDENTIFIER” with the identifier from step 3:
bcdedit /delete IDENTIFIER - Restart your computer to see if the “Choose an operating system” screen has been removed.
Fixing the Master Boot Record (MBR)
In some cases, the Master Boot Record (MBR) may be corrupted, leading to boot issues. You can try to fix the MBR by following these steps:
- Boot your computer using a Windows installation media (USB or DVD).
- When the Windows Setup screen appears, click “Next.”
- Click “Repair your computer” in the lower-left corner.
- Choose “Troubleshoot” > “Advanced options” > “Command Prompt.”
- Type the following commands one by one, pressing Enter after each:
bootrec /fixmbr
bootrec /fixboot
bootrec /scanos
bootrec /rebuildbcd
- Restart your computer and check if the boot issue is resolved.
Resetting your PC
If none of the above methods work, you can try resetting your PC. This will reset Windows to factory defaults and remove any problematic settings or files that may be causing the boot issue. Be sure to backup your important data before proceeding.