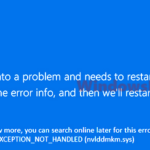
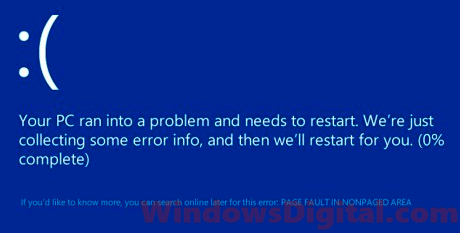
The PAGE_FAULT_IN_NONPAGED_AREA blue screen error is a common issue experienced by Windows 11 and Windows 10 users. It typically manifests with a STOP code message, instructing the user to restart their PC.
This error can be caused by a variety of factors, such as corrupted system files, driver conflicts, hard disk errors, software conflicts, and faulty RAM. In this article, we will explore several possible solutions to help you resolve this frustrating issue.
Page Contents
Possible causes of the problem
Before attempting to fix the error, it’s important to understand its underlying cause. Some of the most common causes include:
- Corrupted or missing system files: This can happen after a major Windows update or due to other software issues.
- Hard drive errors: Issues with your hard drive, such as bad sectors or other problems, can lead to this error.
- Driver conflicts: If you have outdated or incompatible drivers, this can cause conflicts that result in the blue screen error.
- Faulty RAM: A faulty or failing RAM module can also lead to this error.
How to fix “Page_Fault_In_Nonpaged_Area” error
To resolve the PAGE_FAULT_IN_NONPAGED_AREA blue screen error, follow these steps in the order provided. Each solution is arranged in order of importance, so you can work your way down the list until you find one that works for your specific issue.
Solution 1: Run System File Check and CHKDSK
If you can still access your Windows, go to the start menu, type cmd, right-click command prompt from the search result, and select Run as administrator. In the command prompt, type the following commands:
sfc /scannow
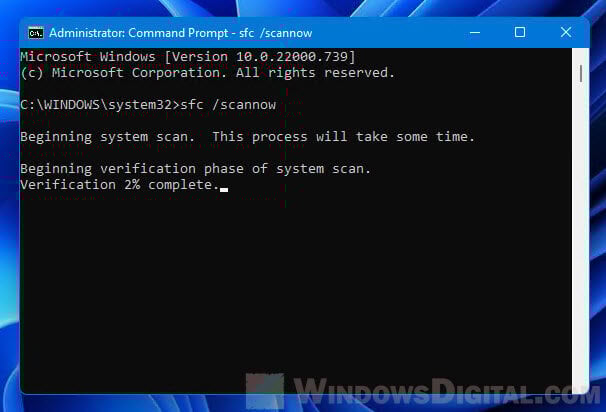
This command will allow Windows to automatically scan and repair missing or corrupted system files. The process may take some time. When it’s completed, enter the next command:
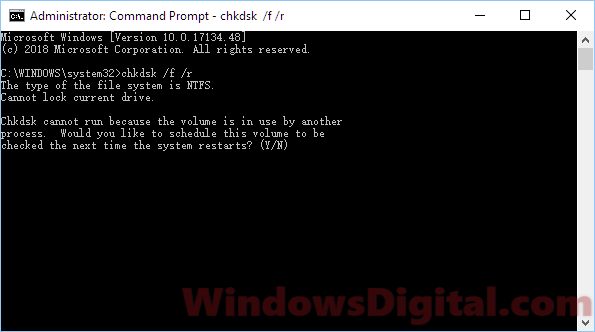
chkdsk /f /r
It may ask if you would like to schedule a full scan on your next restart due to disk volume being used by another process. Type Y to have it done so. Restart your computer, and the CHKDSK will be started automatically.
If you can’t boot into Windows at all:
If you cannot boot into Windows to open the Command Prompt in the first place, try booting Windows into safe mode. If you still encounter the blue screen error even in safe mode, you need to boot into Windows recovery mode.
To force boot into recovery mode, do the following:
- Hold and press the power switch of your computer for about 5 seconds until the computer is completely off.
- Switch it on again.
- When it starts to load Windows, force shutdown using the same method again. Do this three times continuously.
- When Windows detects too many failed startups, it will boot into Windows recovery mode.
In Windows recovery mode, go to “Troubleshoot,” select “Advanced options,” then open “Command Prompt.” Execute the two commands mentioned above.

When both scans are completed, try to reproduce the PAGE_FAULT_IN_NONPAGED_AREA blue screen error and see if it still appears.
Solution 2: Manage paging file size
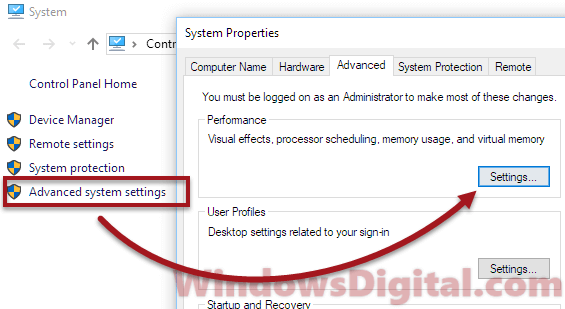
The blue screen error could also be due to a wrongly set or insufficient paging file size. To check your paging file and virtual memory in Windows 10 or 11, follow the steps below:
- Go to the Start menu.
- Type “System” and open it.
- From the left pane, click on “Advanced system settings.”
- Go to the “Advanced” tab.
- Under “Performance,” click “Settings.”
- In the “Performance Options” window, go to the “Advanced” tab.
- Click “Change” under virtual memory.
If the “Automatically manage paging file size for all drives” option is enabled, uncheck it to disable it. Then, select a drive where you can spare some disk space for virtual memory. Choose “Custom Size” and give it 5000 MB or any size you want (preferably a size higher than the recommended paging file size).
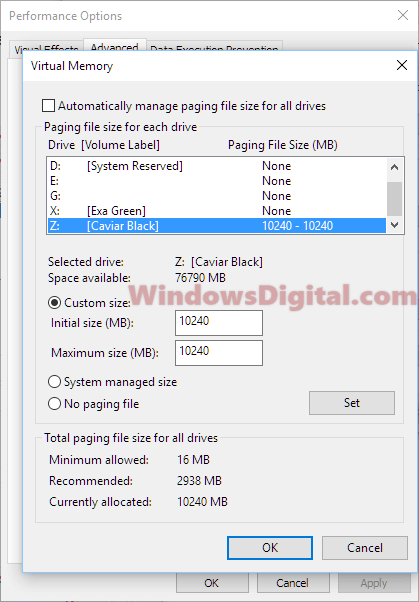
If the “Automatically manage paging file size” option was disabled by default, increase the paging file size (just double the current custom file size). Restart your computer and see if the blue screen error is resolved.
Solution 3: Check Windows Updates and drivers
Since the blue screen error is related to system files, it’s useful to run Windows updates to check for the latest bug fix release. Go to “Settings,” “Update & Security,” and then click “Check for updates.”
It’s also recommended to check your drivers and make sure they are up to date. To check your drivers, go to the Start menu, search for “Device Manager,” and open it. Select a hardware device, right-click it, and click on “Update driver” to allow Windows to automatically scan for the latest driver from the Windows repository. You should check drivers for particularly your graphic card, sound card, and other audio drivers. A broken or outdated driver could be the cause of the PAGE_FAULT_IN_NONPAGED_AREA blue screen error in Windows 11 or 10.
Solution 4: Rollback, System Restore or Reset
If you suspect a recent Windows update caused the PAGE_FAULT_IN_NONPAGED_AREA error, you may want to try rolling back the Windows 11/10 update. If the rollback option does not appear, you may want to try system restoring Windows to a previous date.
If none of these options work, resetting your Windows to factory defaults may be necessary. However, this should be considered a last resort as it will erase all of your data and installed programs.