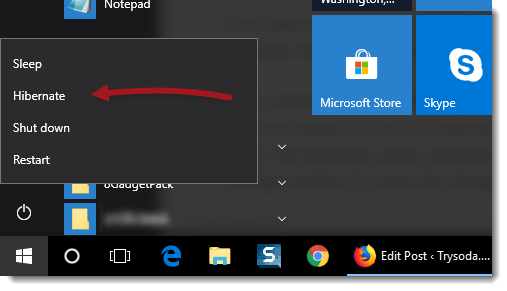
If you’re using a laptop, the Hibernate power option will usually appear when you click on the Power button on the Start Menu. However, it’s not always available on desktop computers. This tutorial will show you how to enable the Hibernate button in the Windows 10 Start Menu.
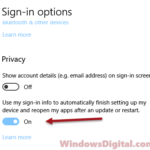
If anyone or any website tells you that Hibernate is already enabled by default, and you just can’t see it, the truth is that Hibernate is partially enabled since Windows 8. The fast startup you’ve been experiencing relies on the hibernation technology, but it means to shut down your PC. However, it’s still not as efficient as the full Hibernate feature, which allows you to close and resume all your work exactly the way it was.
The Hibernate option is hidden by default on most desktop computers running Windows 10. We will have to manually re-enable it to have it shown in the power menu again.
Enable Hibernate power option in Windows
To enable the Hibernate power option in Windows, follow the steps below to add the Hibernate option to the power menu where we usually click on Shutdown, Restart, or Sleep options:
- Click on Start menu. Type “control panel” and open it.
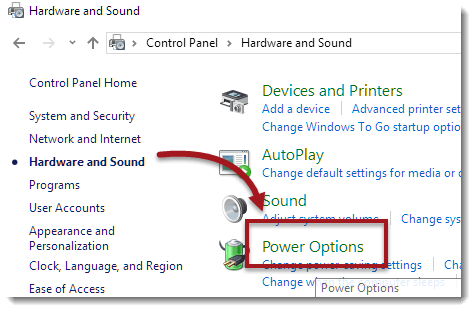
- Go to Hardware and Sound.
- Click on Power Options.
- On the left panel of the window, select Choose what the power buttons do.
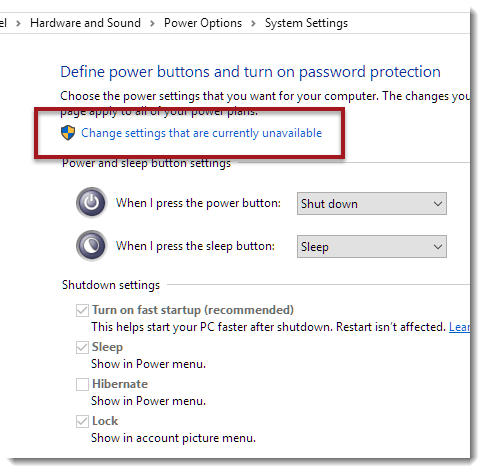
- Click on the “Change settings that are currently unavailable” link. If windows prompt for permission, click OK.
- Under Shutdown settings, tick the checkbox labelled Hibernate – show in power menu.
- Click save changes.
Now, go to your Start Menu’s power options. The Hibernate option should be there now.
If you no longer need the button and want to hide it from the power button’s menu, simply follow the steps above until step 6. Remove the checkbox labeled “Hibernate” to hide it away from the power menu.
Hibernate option is not appearing as a checkbox
If the Hibernate option is nowhere to be found in the system settings or if it’s just gone missing or vanished after several uses, try the following workaround:
Open Command Prompt by going to the Start menu, type “cmd,” right-click it, and run as administrator. In the Command Prompt, type “powercfg /h on” and press Enter. The Hibernate option should show up again as a checkbox in the power settings window. To revert the change, type “powercfg /h off.”
Why hibernate your computer is a good idea and what to think about
Turning on the Hibernate option is pretty handy for folks who use their desktops a lot, either for work or just for fun. It lets you quickly save everything you’re doing and turn off your computer without losing any of your unsaved stuff. Plus, Hibernate mode is more power-saving than Sleep mode because it turns off your computer completely while still keeping your work safe.
But, there’s a catch. Not all devices let you use the Hibernate option, especially if they don’t have a lot of storage space. Sometimes, this option is turned off to keep the device’s storage from getting too full. Also, when you use Hibernate, it might take your computer a bit longer to wake up compared to Sleep mode. But really, it’s not a big deal when you think about the benefit of not losing your work.
One thing to remember is that Hibernate is best for times when you know you won’t need your computer for a while, like overnight. For short breaks, Sleep mode is the way to go since it’s faster to get your computer running again.